Setting up SiempreCMS
Version 1.3 doesn’t come with a fancy installer (it’s on the to-do list). So it requires a little bit of PHP knowledge to setup initially but anyone should be able to follow the below instructions. If you get any errors then step over these steps below again to ensure you’ve done everything correctly.
Server Requirements
- PHP 5.4 min
- MySQL 5.6.12 min
- Apache 2.4.4 min with apache mod_rewrite enabled
At present no directories need to be writeable except the media and cache directories.
Downloading
You can find a link to download the project on the downloads page.
Suggested File & Folder Structure
It’s strongly recommended that you run the SiempreCMS admin interface over SSL (HTTPS). For ease of getting started SiempreCMS comes with everything running from a single folder – this is fine for most projects but this means that there are two config files you must change on setup.
Seperating the Admin and the Frontend
The reason to have two config files is so you can move the /docs/admin/ and /admin-includes/ folders to separate website instances. That way you can secure the admin "site" via IP and HTTPS to harden PHP session security. This isn't required to get you started - for now just keep everything running in a single instance.
Create a MySQL DB
DB Name
Create a DB (suggested name is siempre_cms) and add a MySQL user with full read-write permissions on this DB.
Run The DB Script
Next run the SQL script found in the /backups/ folder against this DB. If you've named the DB something other than siempre_cms then change this on lines 16 and 17 first. This will set up the SiempreCMS DB.
If you’re not sure how to execute SQL statements from a text file see https://dev.mysql.com/doc/refman/5.7/en/mysql-batch-commands.html
Copy the files
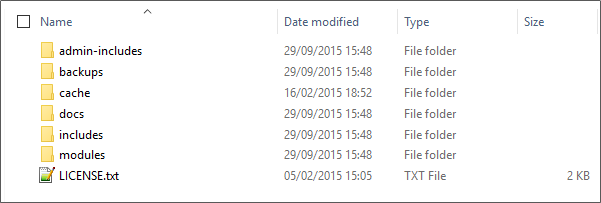
Take a note of the production recommendation but the simple way is to copy all the files into your www folder. You should have something like this:
File Permissions
The /docs/media and /docs/cache folders should be writable by the apache service if you plan to allow users to upload images themselves and enable the cache. Test this after install!
You will be able to disable caching via a config setting – during initial setup of templates this is advised.
Setting up Apache
What you’ll notice is that there is a docs folder. This is the folder you should be serving the website from. You’ll need to configure this in Apache – the suggested method is via Virtual Hosts.
Using the \conf\extra\httpd-vhosts.conf file, checking first you have this enabled (see http://httpd.apache.org/docs/2.4/vhosts/index.html). A development example is given below. Note the display_errors settings should obviously be changed before putting the site live / viewable to the public.
<VirtualHost *:80>
ServerAdmin webmaster@dummy-host2.localhost
DocumentRoot "C:/wamp/www/siemprecms/docs"
ServerName siemprecms.localhost
ErrorLog "C:/wamp/logs/siemprecms.localhost-error.log"
CustomLog "C:/wamp/logs/siemprecms.localhost-access.log" common
<Directory "C:/wamp/www/siemprecms">
php_value include_path "C:/wamp/www/siemprecms/includes;C:/wamp/www/siemprecms/admin-includes/"
php_flag log_errors on
php_flag display_errors on
php_value error_reporting 2147483647
php_value error_log "C:/wamp/logs/siemprecms.localhost-error.log"
allow from all
</Directory>
</VirtualHost>
Config files
SiempreCMS has TWO sets of config files – one for the admin interface and one for the front end. The two config files require renaming and some basic details setting (note your MySQL DB details need to be set correctly in BOTH files).
/includes/config.inc.php
Rename the config.inc.RENAME.php file to config.inc.php (e.g. remove the .RENAME)
The following settings should be set.
· DOMAIN – set this to be your domain / web address (e.g. “localhost” or “mydomain.com”)
· EMAIL – currently not used but set this to be the administrator’s email
· STARTTOKEN – this should not be changed.
· ENDTOKEN – this should not be changed.
· DEBUG – set this to false
· DB_SERVER – MySQL server IP / URL
· DB_NAME – set this to be your MySQL DB name
· DB_USER – MySQL DB username
· DB_PASSWORD – MySQL DB password
· CACHE_ENABLED – true or false
· CACHE_LENGTH - cache length in seconds
/admin-includes/admin.config.inc.php
Rename the admin.config.inc.RENAME.php file to admin.config.inc.php (remove the .RENAME)
The following settings should be set.
· MAXIPATTEMPTS – currently not used but set this to be the administrator
· LOCKOUTMINS– this should not be changed.
· LOGOUTMINS– this should not be changed.
· SAFEWHITELIST – this should NOT be changed.
· DEMO – this should NOT be changed.
· DB_SERVER – server IP / URL
· DB_NAME – set this to be your DB name
· DB_USER – DB username
· DB_PASSWORD – DB password
Additionally you should first now log in and then change:
· SALT – *only* change this after you’ve logged in, see below
Testing
Testing the Front end
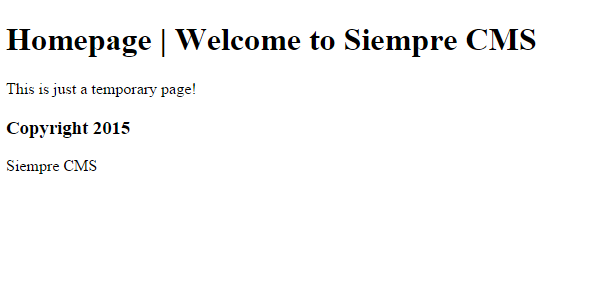
First test the front end! You should see our default landing page – don’t worry this is intentionally very plain and ugly-looking!
If you see an error about template ID and a 404 page check you've actually ran the SQL script to setup the DB!
Testing the mod_rewrite
As SiempreCMS will handle all page requests you need to ensure the Apache module mod_rewrite is enabled.
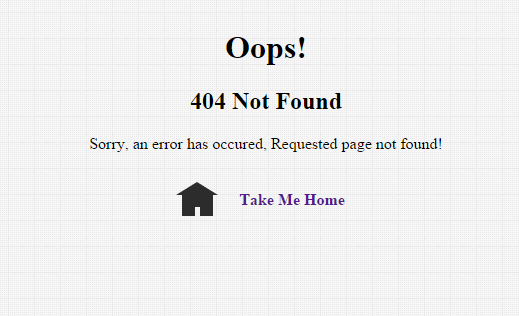
To do this add /news onto the URL in your browser. When hitting yoursite.com/news you should see an unstyled 404 from SiempreCMS like below.
If, instead, you see an Apache 404 like that below then you need to enable the rewrite module first.
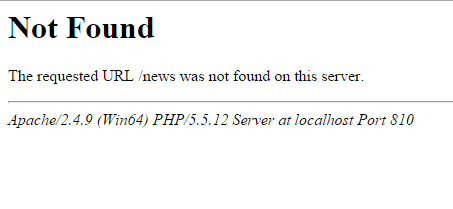
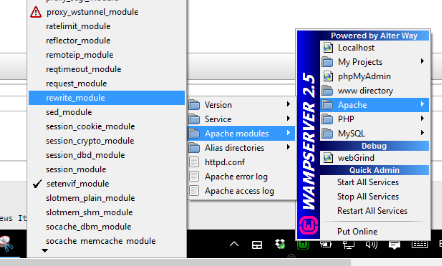
On modern hosts this is almost always enabled. If not check your host setup guide. For WAMP (usually used for local development) you can just enable this from the WAMP control tray, see below, for Linux servers see https://www.digitalocean.com/community/tutorials/how-to-set-up-mod_rewrite#Section 1
You may wish to check your Apache directory settings – ensure AllowOverride is set to All to allow the .htaccess files to take effect.
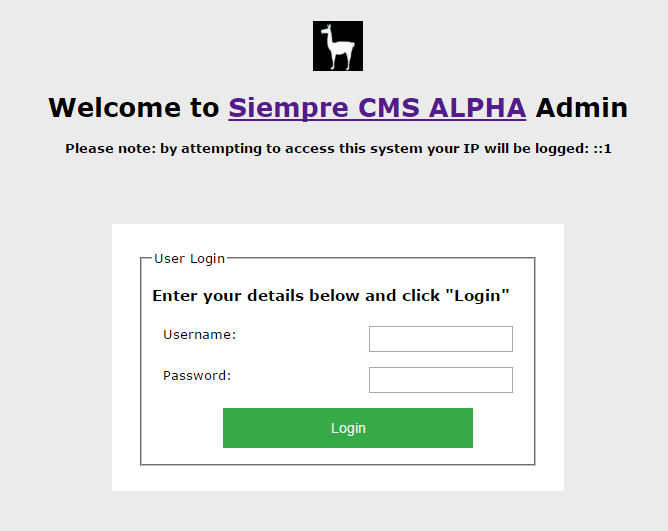
Testing the Backend
Then hit the backend by adding /admin to the URL. You should now be able to login.
If you get error messages check your MySQL settings in the /admin-includes/ config file in the steps above again.
Otherwise login:
User: admin
Password: admin (don’t forget to change this!)
Clearly, your FIRST priority is to change this!
You may find that SiempreCMS updates itself (this is just where the DB script is a little behind recent bug fixes). Follow the instructions - no need to backup at this point!
Changing the admin password
Go to the Users section and click the Search button. Before you change the admin account’s password you should also change the salt value in the /admin-includes/admin.config.inc.php config file.
Ensure you can now login and out with your account.
For extra security you may also wish to change the username of the admin account – this can only be done by changing the value via MySQL in the cms_users table.